Bag Making Tutorial - A Guide to Reading and Following Fabric Patterns
If you're new to bag making, following a pattern is an easy way to get started. In this tutorial, we'll go over the basics of following a bag making pattern.
Step 1. Choose a Pattern
Patterns can be bought or downloaded. Many resources also offer bag making patterns which can be downloaded for free. Firstly, decide on the style of bag you want to create, then choose a pattern of the same style.
Step 2. Gathering Materials and Supplies
Once you have your bag-making pattern, you'll need to gather your materials and supplies. Your pattern will specify the amount of material and the specific supplies required to complete the project. These typically include fabric, interfacing, thread, and various types of bag hardware such as zips, clasps, and D-rings. Additionally, you'll need basic sewing tools like scissors, pins, needles, a ruler and a sewing machine. Ensuring you have all the necessary materials and supplies before you begin will help you follow the pattern smoothly and avoid interruptions during the bag-making process.
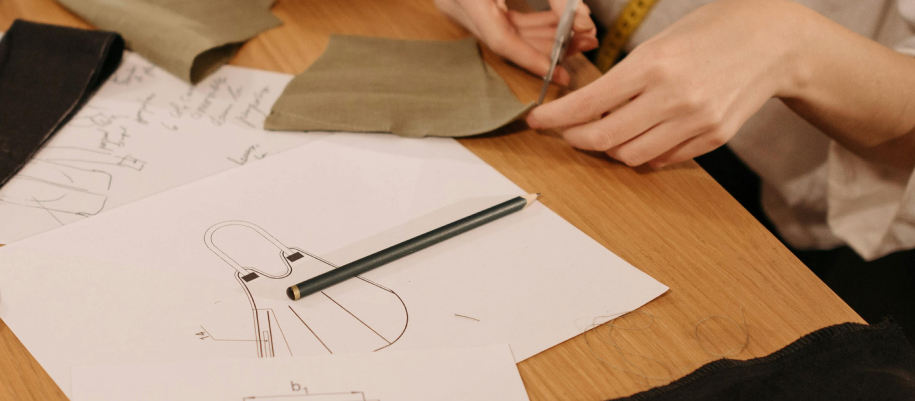
Step 3. Read Through Pattern
If you've never read or followed a sewing pattern before, you'll first want to familiarise yourself with some common terms and symbols used. Most patterns rely on symbols to instruct the user on where to cut, fold and sew the fabric, as well as various other techniques.
Step 4. Cut Pattern Pieces
Fabric patterns are usually printed on a large sheet of tracing style paper. The pattern pieces are designed to be cut from the paper and pinned onto the fabric. Then, the pieces are used as a type of stencil so the fabric can be cut to the correct size. If you're using a digital pattern however, you'll need to first tape your pattern pieces together rather than cut them from the pattern sheet.
Most fabric will require some sort of prep before use. If your fabric is washable washing can prevent future shrinkage and reduce colour transfer. Ironing the fabric to remove any wrinkles will also ensuring smooth and accurate cutting.
Step 6: Lay Out and Cut Fabric
• Lay Out Fabric: Lay your fabric flat on a cutting surface. Place the pattern pieces on the fabric, following the grainline instructions.
• Pin or Weight Down: Pin the pattern pieces to the fabric or use pattern weights to keep them in place.
• Cut Fabric: Use scissors or a rotary cutter to cut around the pattern pieces.
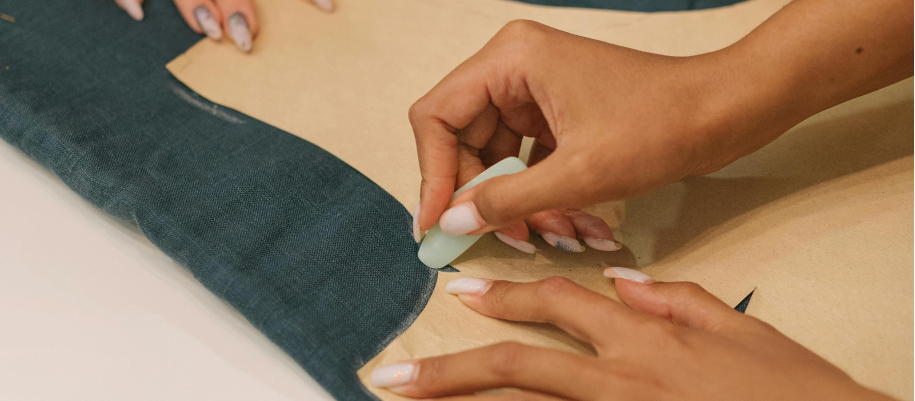
Step 7: Transfer Markings
Mark Fabric: Transfer any markings from the pattern to the fabric using a fabric pen, chalk, or tailor's tacks. These markings could include darts, pleats, and placement points for hardware.
Step 8: Interface Pieces • Cut Interfacing: Cut interfacing pieces as required by the pattern.
• Fuse Interfacing: Attach interfacing to the wrong side of the fabric pieces according to the manufacturer's instructions.
Step 9: Assemble the Bag
• Follow Instructions: Start assembling the bag by following the pattern instructions step-by-step.
• Sew Seams: Sew the pieces together, starting with smaller sections and working your way to the main body of the bag.
• Attach Hardware: Add any hardware components as directed in the pattern.
Step 10: Finish the Bag
Hem and Finish Edges: Hem any open edges and finish seams as instructed.
• Turn Bag Right Side Out: If necessary, turn the bag right side out and ensure all corners and edges are properly shaped.
• Final Press: Give the bag a final press to ensure a crisp, professional finish.
Step 11: Inspect and Enjoy
Inspect Work: Check all seams and hardware to ensure everything is secure and properly attached.
Enjoy Your Bag: Your handmade bag is now ready to use or gift!